
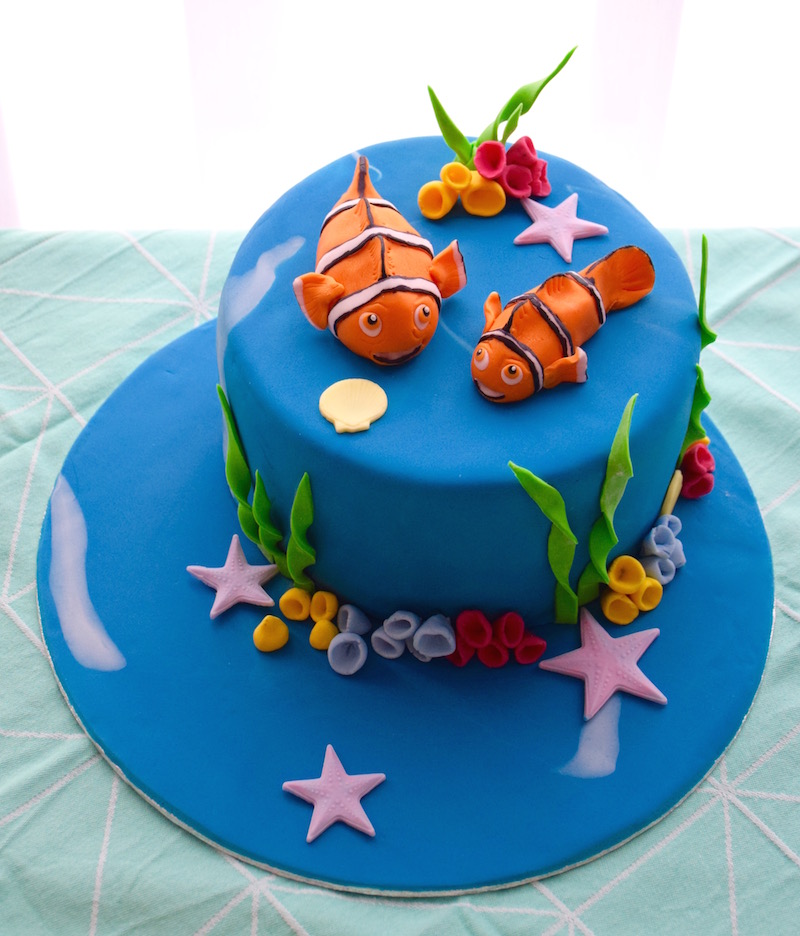
Ah Finding Nemo !!! I must confess that I have soft spot for this Disney movie… It clearly deserved a Nemo-themed cake on Fashion Cooking ;-). Also the opportunity to do some fondant modeling. This is not really my favorite part but I must say it is definitely worth it to know how to make those, as possible the decorations options are endless. Actually, what I find the most difficult is to find all the different colours of fondant! But once you got everything, it is rather funny. It felt like playing with Plasticine! Finally read well the instructions and you’ll soon become a figure modelling expert!
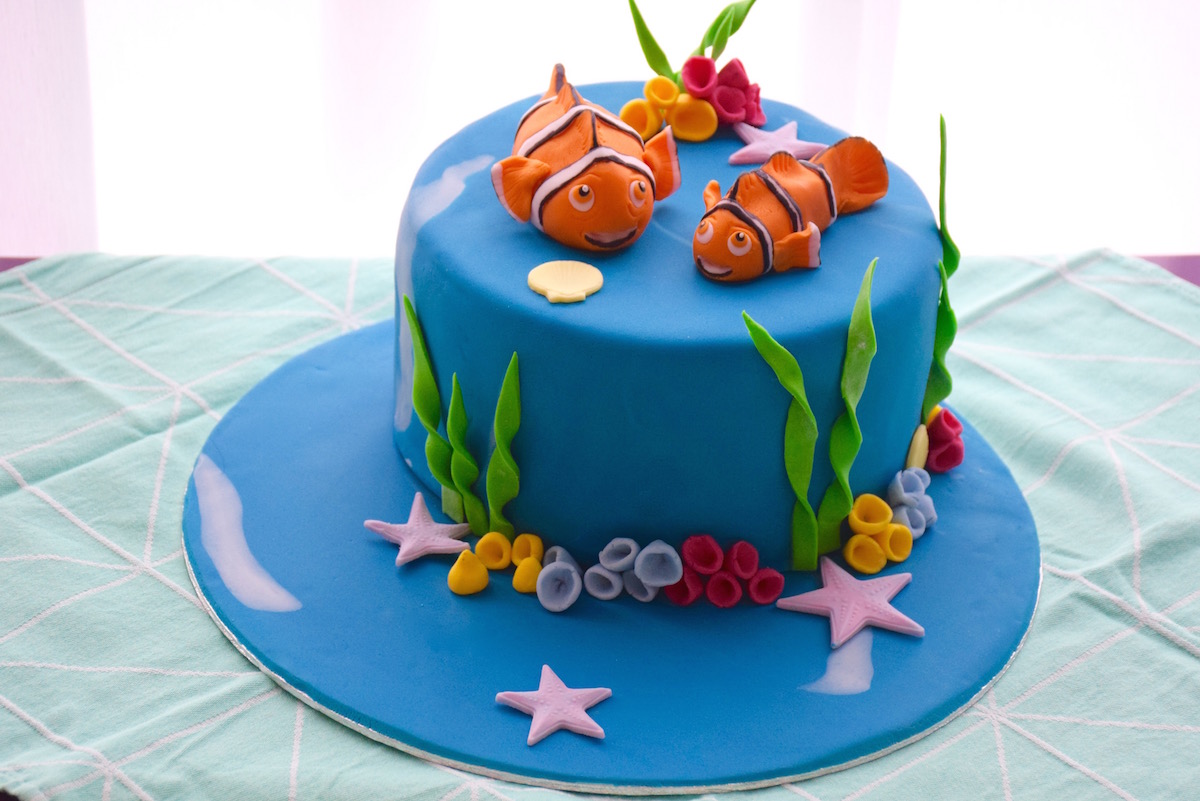
What I really like about fondant modelling is that once the characters are dry, they will keep for ever in an airtight container protected from dust and moisture. Super handy if you want to make them in advance or to reuse at the next anniversary, hehe. I let you watch our modelling session with Aurélie, I mean what remains of it because there was a problem during recording of the video and most of my parts were cut. But I promise, I did model almost everything …
Serves 10-12
- one high 20cm diameter cake, frozen and covered with Atlantic blue fondant (to cover the cake you will need 900g)
- 350g blue fondant
- 250g orange fondant
- some white fondant
- some green fondant for the seaweed and the colours of your choice for the rest of the marine decorations
- black edible pen
- sea life fondant mould (optional)
- 30cm diameter cake platter
- Take about 300g of blue fondant and form a ball and then flatten it with your hands. Add small pieces of white fondant before spreading. Once the fondant spread, they will deform and create the foam of the sea.
- Spread it thinly with a rolling pin directly on the cake platter and cut the excess with a knife. Place the cake a little off center on the platter.
- To shape Marlin, take a ball of about 100g of orange fondant and model it into a sausage with one end thinner than the other.
- Flatten the end of the coil to form the tail and then pinch the top to form two dorsal fins.
- Create two small cavities where for the eyes and cut a small slit for the mouth.
- To create the eyes, form two small balls in white fondant, press flat.Add two smaller orange fondant cercles. Draw a dot with the black edible pen then add a very small amount of white inside the dot.
- Secure it all in the cavity of the eyes with a little edible glue. Fill the slit of the mouth with a white fondant coil and then draw a black line on the bottom lip with the edible pen.
- Cut out three thin strips of white fondant and paste them between each fin. Draw a black line on either side of each white strip.
- Finally create the pectoral fins: flatten a thin strip of white fondant on a wide strip of orange fondant and cut a small rounded rectangle with the white on one end.
- Crease one side of the rectangle with your fingers to form the fin and attach one to each side of the body behind the first black and white stripe. Draw a black line at the end.
- Repeat the same step for Nemo using a little less orange fondant to make it smaller.
- Cut pointy thin strips of green fondant for the seaweeds.
- Twist them gently between your fingers and dry a few moments on a paper towel before attaching them to the sides of the cake with edible glue.
- Make several sea of flowers in the colours of your choice: using fondant modelling tool, create a small cone-shape hole in little balls.
- Attach them around the cake with edible glue.
- You can use a sea life themed fondant mould to create starfish and seashells to complete your decor. Sprinkle some icing sugar in mould then fill the holes with fondant.
- Flatten with a rolling pin and cut the excess fondant using a palette knife removing your seashells from the mould.
- Once the sea elements are attached to the cake you can gently add Nemo and Marlin in the center.
Tips for modelling Nemo and any other characters in fondant
– Use a 50/50 gumpaste and fondant mix. The texture is always great but I’m not a big fan of this option because we basically you need to colour the fondant by hand (and I hate colouring fondant, it’s long and it makes a mess). Since there aren’t so many gumpaste colours available out there, the easiest is to use white gumpaste. Then you either mix it with white sugar paste and colour the mix in the needed colours or is mixed it with coloured fondant but inevitably the colour fades … -> In other words, not my favorite solution
– Or add Gum-tex powder to the fondant to get a perfect texture for modelling. The ration is a teaspoon of Gum-tex powder for 250g of fondant. Then knead well and let rest 1 hour firmly wrapped in cling film (be careful, it dries faster then regular fondant!) in an airtight container, and your modelling fondant is ready to be used. And you can use any colour you want and it won’t fade in the process -> Great!!!



Leave a Reply